5 Easy Steps to Draw a House Sparrow in a Tree
Drawing a house sparrow in a tree begins with gathering fine pencils, a robust sketch pad, precision erasers, and blending tools. Sketch basic shapes using ovals for the sparrow's body and circles for the tree's structure.
Detail the bird's wings, tail, and facial features with layered, curved lines. Intricate tree bark patterns and leaf veins add texture, while hatching and cross-hatching techniques provide depth.
Gentle shading and blending accentuate the realism of both the sparrow and the tree. Focus on tiny highlights to bring the bird's eye to life, ensuring softness and authenticity in the feathers.
For further insights, continue exploring.
Key Takeaways
- Start with an oval for the sparrow's body and basic shapes for wings, tail, and facial features.
- Outline the tree with elongated ovals for the trunk and clusters of circles for foliage.
- Use hatching and cross-hatching techniques to add texture and depth to the tree bark and sparrow's feathers.
- Blend colors and textures smoothly to create a cohesive, realistic composition.
- Add shadows, highlights, and fine details to enhance realism and ensure the sparrow fits naturally in the tree.
Gather Your Materials
To start your artistic journey of sketching a house sparrow perched in a tree, it is vital to meticulously gather a detailed set of high-quality sketching materials.
Begin with a variety of fine pencils ranging from H for light lines to 6B for deep shadows. Include a robust sketch pad with smooth, acid-free paper to guarantee durability and longevity of your artwork. Precision erasers, both kneaded and vinyl, are essential for refining details.
Furthermore, a collection of colored pencils or watercolors can bring liveliness to your composition. Consider investing in blending tools like tortillons to achieve smooth gradients.
Lastly, a high-quality sharpener and a ruler will assist in maintaining sharp pencil points and accurate proportions. Equip yourself thoroughly to enhance your artistic expression.
Sketch Basic Shapes
To begin, observe the house sparrow and the tree, noting their essential forms. Sketch an oval to represent the sparrow's body and a series of lines to outline the tree's structure.
It's vital to establish accurate proportions, ensuring harmony between the bird and its arboreal perch.
Outline the Sparrow
How does one capture the essence of a house sparrow in its simplest form? Begin by sketching basic shapes that define the bird's structure. Use an oval for the body, a smaller circle for the head, and a tapered shape for the tail. Connect these forms with light lines to establish the bird's posture. Next, add details like the beak, eyes, and legs, ensuring they are proportionate. Observe the subtle curve of the sparrow's back and the delicate taper of its wings.
| Basic Shape | Purpose |
|---|---|
| Oval | Body |
| Circle | Head |
| Triangle | Beak |
| Tapered Line | Tail |
| Curved Lines | Wings and Legs |
This foundational structure sets the stage for more intricate detailing in subsequent steps.
Define Tree Structure
With an observant eye, begin by outlining the fundamental shapes that will form the tree's framework, using elongated ovals for the trunk and branches, and clusters of circles for the foliage. These basic shapes serve as the skeletal framework of your tree, guiding the intricate details to follow.
The trunk should be represented by a series of overlapping ovals, tapering as they ascend. Branches extend outward, diverging into thinner ovals that mimic natural growth patterns.
For the foliage, envision the tree's crown as a series of overlapping circles, varying in size to suggest depth and volume. This methodical approach guarantees that the tree's framework is both organic and harmonious, laying a solid foundation for the detailed rendering of your house sparrow's environment.
Establish Proportions Correctly
Having established the tree's structural framework, the next step involves accurately sketching the fundamental shapes to guarantee proper proportions between the tree and the house sparrow.
Begin by lightly outlining the primary forms: an oval for the sparrow's body, a smaller circle for its head, and slender rectangles for the tail and wings. Confirm the bird fits naturally among the branches, harmonizing in scale and positioning.
Observe the tree's limbs, using them as reference points to place the sparrow convincingly. Pay attention to the relationship between the bird's size and the tree's elements, confirming neither overwhelms the other.
This foundational sketch sets the stage for intricate detailing, creating a balanced and realistic composition.
Outline the Sparrow
Shifting from basic shapes to a refined outline, begin by enhancing the sparrow's form with precise contours, focusing on the natural curvature of its body.
Pay close attention to the intricate details of the wings and tail, ensuring each feather is thoughtfully rendered.
Basic Shape Formation
The initial step in outlining a house sparrow involves sketching an oval for its body, ensuring the proportions capture the bird's distinctive compact and rounded form. This foundational shape will serve as the core structure upon which all other details are built.
Next, add a smaller oval atop the larger one to represent the head, maintaining a slight overlap to indicate the neck area. Place a guideline through the head oval to help position the eyes and beak accurately. For the beak, draw a small triangular shape extending from the head.
Wing and Tail Details
To bring the house sparrow to life, meticulously outline the wings by sketching a series of layered, curved lines that capture the intricate feather patterns. Begin with the primary feathers, which are long and slightly arched, extending from the wing's edge. Layer these with secondary feathers, shorter and more compact, nestled closer to the sparrow's body.
Shift to the tail, emphasizing its fan-like spread by drawing elongated, tapered lines that slightly overlap. Each feather should convey a sense of texture and density to enhance realism. Pay attention to the subtle variations in length and curvature, ensuring a natural, dynamic flow.
This detailed approach will imbue your drawing with authenticity and depth, highlighting the sparrow's elegant anatomy.
Facial Features Outline
With the wings and tail meticulously detailed, focus shifts to the house sparrow's facial features, which require careful attention to capture its keen expression and characteristic markings.
Begin with the sparrow's beak, a small yet defining attribute, drawing it as a slightly curved, conical shape.
Next, outline the eyes, positioning them prominently to convey alertness. The eyes should be round and dark, with a slight glint to suggest liveliness.
Surround the eyes with the distinctive feather patterns that frame the sparrow's face, ensuring to include the subtle variations in shading.
Add Tree Details
Enhancing the tree's realism involves meticulously sketching the intricate patterns of bark and the delicate veins of each leaf. Begin by observing the natural textures on the tree's trunk; use fine lines and subtle curves to replicate the roughness and grooves.
Each leaf should display a central vein with smaller, branching veins to convey lifelike detail. Vary the direction and thickness of these lines to reflect natural light and shadows. Pay attention to the way leaves cluster and overlap, ensuring they appear organic.
The branches should taper naturally and occasionally show small knots or imperfections. These details collectively lend authenticity to the tree, providing a fitting and realistic environment for the house sparrow perched within its branches.
Enhance With Shading
Shading breathes depth and dimension into your drawing, transforming flat shapes into lifelike, three-dimensional representations. To enhance the house sparrow and the tree, consider the light source and how it interacts with the shapes. Use varied pencil pressures to create gradients, achieving a realistic portrayal of shadows and highlights.
| Shading Technique | Application | Effect |
|---|---|---|
| Hatching | Tree bark | Adds texture and depth |
| Cross-hatching | Sparrow's wings | Creates intricate feather details |
| Blending | Sparrow's body | Smooth shifts in shading |
| Stippling | Leaves | Conveys leaf texture |
| Contour shading | Branches | Emphasizes branch curves |
Carefully apply these techniques to areas needing emphasis, ensuring each element harmonizes under the unified light source. This method will bestow your drawing with authenticity and importance.
Final Touches
Upon completing the shading techniques, the final touches will bring your house sparrow and tree drawing to life, adding subtle details and refining the overall composition.
Begin by enhancing the texture of the sparrow's feathers with gentle, fine lines to depict the delicate plumage. Pay close attention to the bird's eye, adding a tiny highlight to convey a lifelike sparkle.
For the tree, introduce intricate bark patterns and varied leaf shapes to create depth and realism. Softly blend any harsh lines to guarantee harmony throughout the piece.
Conclusion
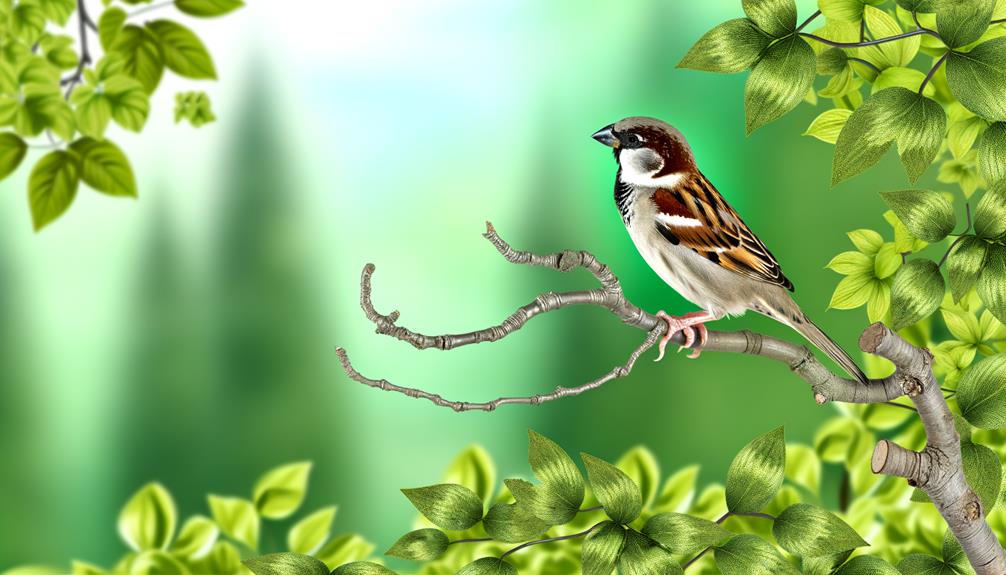
Drawing a house sparrow perched in a tree demands dedication, diligence, and detailed observation. By gathering materials, sketching basic shapes, outlining the sparrow, and adding tree details, the foundation is formed.
Enhancing with shading and applying final touches guarantee the illustration achieves artistic authenticity. This meticulous methodical process transforms simple sketches into splendid scenes, showcasing the serene synergy between the sparrow and its arboreal abode.
Such structured steps highlight the harmonious blend of nature and artistry.

