5 Simple Steps to Build a Sparrow Bird House
To build a sparrow birdhouse, start by selecting untreated, rot-resistant hardwood like cedar or redwood, and cut planks to ¾ inch thick. Cut front and back panels to 8×8 inches, side panels to 6×8 inches, roof pieces to 10×8 inches, and the base to 6×6 inches.
Join these using weather-resistant wood glue and galvanized screws, ensuring 90-degree angles. Drill a 1.5-inch entrance hole, positioned 6 inches from the floor.
Mount the birdhouse in a safe, moderately sunny location, securing it with galvanized brackets. Regularly clean and inspect for structural integrity.
For more precise steps, follow our detailed guide.
Key Takeaways
- Use untreated, rot-resistant hardwood like cedar and cut panels to specified dimensions: 8×8 (front/back), 6×8 (sides), 10×8 (roof), 6×6 (base).
- Join pieces with weather-resistant wood glue and galvanized screws, pre-drilling pilot holes to prevent splitting.
- Cut a 1.5-inch diameter entrance hole, positioning it 6 inches above the floor for optimal protection.
- Securely attach the birdhouse in a predator-free location with moderate sunlight using galvanized screws or brackets.
- Maintain by cleaning twice a year, inspecting for structural issues, and addressing pests with non-toxic treatments.
Choosing the Right Wood
Choosing the right type of wood is crucial for guaranteeing the durability and safety of your sparrow bird house. Opt for untreated, rot-resistant hardwood such as cedar or redwood, which withstands outdoor conditions. Avoid using pressure-treated or chemically-treated wood, as the toxins can harm birds.
Begin by selecting planks that are ¾ inches thick. This thickness provides adequate insulation and structural integrity. Make sure the wood is free from knots, which can weaken the structure, and sand any rough edges to prevent injury to the birds. Additionally, use weather-resistant wood glue for joining pieces, enhancing longevity.
Gathering Essential Tools
To construct a sparrow bird house effectively, gather essential tools such as a measuring tape, handsaw, hammer, nails, drill, and weather-resistant wood adhesive. Start by selecting a reliable measuring tape to guarantee all dimensions are precise.
A high-quality handsaw is crucial for making clean, accurate cuts. Use a robust hammer and appropriately sized nails to secure the pieces together. A drill, equipped with various bit sizes, is necessary for creating pilot holes and ventilation openings.
Weather-resistant wood adhesive will provide additional strength to the joints. Guarantee all tools are in good working condition to facilitate a smooth construction process. Having these tools ready will streamline your project, resulting in a durable and functional bird house.
Cutting the Wood Pieces
Begin by measuring and marking the wood according to the specific dimensions required for each part of the sparrow bird house, ensuring accuracy for best assembly. Use a tape measure and a carpenter's pencil to mark the dimensions precisely.
For the front and back panels, cut two pieces at 8 inches by 8 inches. The side panels should be 6 inches by 8 inches. The roof requires two pieces, each measuring 10 inches by 8 inches. For the base, cut a piece at 6 inches by 6 inches.
Utilize a circular saw or a jigsaw to make the cuts, ensuring straight edges. Sand the cut edges lightly with fine-grit sandpaper to remove any splinters, ensuring a smooth finish.
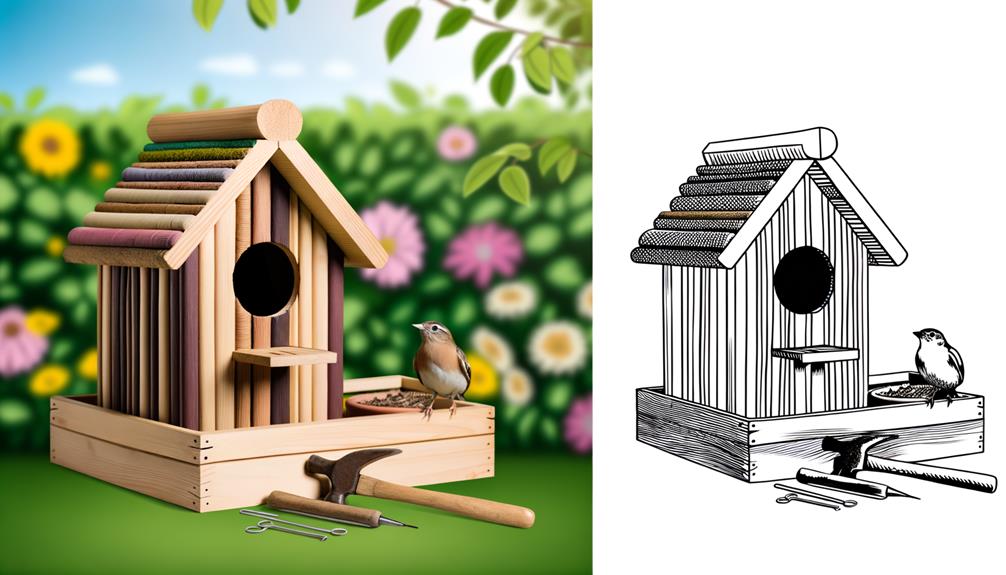
Assembling the Bird House
With all the wood pieces cut and sanded, align the front panel with one of the side panels to start forming the bird house structure. Secure the panels using galvanized screws, confirming the edges are flush. Pre-drill pilot holes to prevent the wood from splitting.
- Pilot Hole Size: Use a 1/16-inch drill bit for the pilot holes.
- Screw Specification: Use 1 1/4-inch galvanized screws to guarantee durability.
- Edge Alignment: Verify the edges meet at a 90-degree angle for structural integrity.
Continue by attaching the back panel, followed by the remaining side panel using the same method. Finally, secure the base by aligning it with the edges of the assembled structure and fixing it with screws. This confirms a stable foundation for the bird house.
Creating the Entrance Hole
To create the entrance hole for a sparrow bird house, start by choosing a diameter of 1.5 inches, which is ideal for sparrows.
Position the hole 6 inches above the floor of the bird house to guarantee adequate protection from predators.
Use a spade bit or hole saw to achieve a clean and precise cut.
Choosing Proper Size
Determining the correct diameter for the entrance hole is crucial, as it should be precisely 1 1/8 inches to accommodate sparrows while excluding larger, competitive bird species. This specific measurement ensures the best possible entry for sparrows, minimizing intrusions from other birds and predators.
To achieve this:
- Use a hole saw: Select a hole saw attachment with a 1 1/8-inch diameter for accurate cutting.
- Mark the center point: Measure and mark the exact midpoint where the hole will be drilled on the front panel of the birdhouse.
- Drill with precision: Secure the front panel, ensuring stability, and drill the hole at a slow, steady pace to avoid splintering the wood.
These steps guarantee a properly sized entrance, enhancing the birdhouse's suitability for sparrows.
Positioning the Hole
Position the entrance hole approximately 6 inches from the base of the birdhouse to secure maximum protection from predators and environmental elements. Use a drill with a 1 1/2-inch hole saw attachment to create the entrance. This diameter is ideal for sparrows, providing easy access while deterring larger birds.
Guarantee the hole is centered horizontally for balanced aesthetics and functionality. Mark the exact spot with a pencil before drilling to maintain precision. After drilling, sand the edges of the hole to remove splinters and rough areas, preventing injury to the birds. Verify that the hole is smooth and free of obstructions.
This approach secures the entrance is safe, functional, and secure for sparrows.
Adding Ventilation Holes
Drilling ventilation holes is crucial to secure proper airflow within the sparrow bird house, maintaining a healthy environment for the birds. Begin by selecting a drill bit with a diameter of 1/4 inch.
Position the birdhouse on a stable surface. Carefully drill four evenly spaced holes, two on each sidewall, approximately 1 inch below the roofline. This placement ensures best airflow while minimizing exposure to rain.
Consider the following guidelines:
- Hole Spacing: Maintain a distance of 2 inches between each hole to secure balanced ventilation.
- Depth Control: Use a drill stop to prevent over-penetration, safeguarding the interior from damage.
- Material Selection: Opt for a high-speed steel (HSS) drill bit for cleaner cuts and reduced splintering.
Adhering to these steps will enhance the longevity and habitability of the birdhouse.
Installing the Roof
To begin installing the roof, align the pre-cut roof panels with the top edges of the birdhouse walls, ensuring they extend at least 1 inch beyond the side and front walls to provide adequate overhang and protection from the elements. Secure the roof panels using galvanized screws, spacing them 2 inches apart along the edges. Verify that the panels are flush with each other at the peak to prevent water ingress.
| Step | Description |
|---|---|
| 1 | Align roof panels with birdhouse walls |
| 2 | Extend panels 1 inch beyond side and front walls |
| 3 | Secure panels with galvanized screws, 2" apart |
Ensure the screw heads are countersunk to avoid snagging. Double-check all alignments and measurements for precision and stability.
Applying Weatherproof Finish
Applying a top-notch weather-resistant finish is essential to safeguard the birdhouse from environmental elements and extend its lifespan. Begin by selecting a sealant rated for outdoor use. Apply a uniform coat using a brush or sprayer, guaranteeing even coverage across all surfaces.
Allow the first coat to dry thoroughly, as specified by the manufacturer, typically 24 hours. Lightly sand the dried surface with 220-grit sandpaper to secure adhesion for subsequent layers.
Preparation: Clean the birdhouse thoroughly to eliminate dust and debris before applying the finish.
Application: Use a top-notch brush or sprayer for an even coat, focusing on corners and edges.
Drying Time: Ensure each coat dries completely, following the manufacturer's recommended drying time, usually 24 hours.
Repeat the process for at least two more coats for prime protection.
Mounting the Bird House
Mounting the birdhouse requires choosing a suitable location that offers safety, visibility, and proper height, typically between 6 to 10 feet off the ground. Begin by selecting a mounting surface such as a pole or tree trunk.
Guarantee the chosen location is away from predators and receives moderate sunlight. Use galvanized screws or weather-resistant brackets for secure attachment. Drill pilot holes to prevent wood splitting. Attach the birdhouse firmly to the mounting surface, making sure it is level.
Position the entrance hole facing away from prevailing winds to protect inhabitants from harsh weather. Confirm stability by gently shaking the mounted birdhouse. Regularly inspect the mounting structure to secure continued safety and security for the sparrows.
Maintaining Your Bird House
Regular maintenance is essential for guaranteeing the longevity and habitability of your sparrow birdhouse. To maintain peak conditions, follow these steps:
- Cleaning Frequency: Clean the birdhouse at least twice a year, preferably after the breeding season and before winter. Remove all nesting material, debris, and droppings.
- Inspection: Examine the birdhouse for structural integrity. Check for cracks, rot, or damage to the wood. Guarantee all screws and joints are secure.
- Pest Control: Inspect for signs of pests such as ants, wasps, and mites. Use non-toxic treatments to address any infestations.
Adhering to these maintenance practices will help create a safe and inviting environment for sparrows, ensuring they return season after season.
Conclusion
The construction of a sparrow bird house involves careful planning and precise execution. From selecting suitable wood to applying a weather-resistant finish, each step is essential for creating a durable and welcoming habitat for sparrows.
Using tools and techniques similar to the craftsmanship of past eras ensures a strong structure. Regular upkeep extends the bird house's lifespan, promoting a favorable environment for sparrows.
Following specific instructions ensures successful completion and peak functionality of the bird house.