
3 Steps to Destroy Sparrow Nests in Days Gone
To obliterate sparrow nests in 'Days Gone,' begin by crafting Molotov cocktails using scrap, kerosene, and rags. Scout abandoned buildings, under bridges, or wooded areas for clusters of twigs and debris.
Use binoculars to spot nests and equip a flashlight for dark areas. Clear surrounding Freakers first.
Aim at the center of the nest and throw Molotovs, then retreat to a safe distance. Monitor the fire to guarantee complete destruction.
Times for the attacks are best during daylight to minimize Freaker activity. Proper preparation and precise actions will make nest destruction more efficient and safer.
Keep gathering tips to perfect your strategy.
Key Takeaways
- Craft Molotov cocktails using scrap, kerosene, and rags to burn Sparrow nests.
- Use binoculars to locate nests and plan your approach carefully.
- Equip gloves and a face mask for protection against debris and fumes.
- Clear surrounding Freakers quietly with silent takedowns before attacking nests.
- Attack nests during daylight hours to reduce Freaker activity and increase visibility.
Understanding Sparrow Nests

To effectively eliminate sparrow nests in Days Gone, you first need to understand what sparrow nests are and where they're typically located. Sparrow nests are clusters of twigs and debris, often found in abandoned buildings, under bridges, or in wooded areas. These nests house Freakers, making them hazardous spots.
When scouting for nests, look for dense, dark areas with lots of waste. You'll usually notice an unpleasant smell and see swarms of Freakers nearby. Approach slowly to avoid alarming the creatures. Identifying the exact location of each nest is essential.
Once you've pinpointed the nests, you can plan your approach. Understanding these details guarantees that you can effectively eliminate these threats, making the environment safer for everyone.
Gathering Necessary Supplies
Before embarking on your mission to demolish sparrow nests, equip yourself with the necessary supplies to guarantee success and safety. First, gather protective gear to safeguard yourself from potential hazards. You'll need gloves and a face mask to avoid direct contact with debris and dust. Collect a robust ladder for reaching high nests and a flashlight to illuminate dark areas. Don't forget to bring a first aid kit for any minor injuries. Here's a quick checklist:
| Supply | Purpose | Notes |
|---|---|---|
| Gloves | Hand protection | Durable, puncture-resistant |
| Face Mask | Respiratory safety | N95 recommended |
| Sturdy Ladder | Access high areas | Ensure it's secure |
| Flashlight | Illuminate dark spots | Extra batteries |
| First Aid Kit | Treat minor injuries | Include antiseptic and bandages |
Now you're prepared for the next steps!
Crafting the Right Weapons

To start crafting the right weapons, first gather essential materials like scrap, kerosene, and rags.
Next, follow the crafting menu to combine these components into Molotov cocktails.
Gathering Necessary Materials
Start by collecting scrap metal, kerosene, and rags, as these will be crucial for crafting Molotov cocktails to effectively demolish sparrow nests.
First, search for scrap metal in deserted cars or structures. It's typically discovered in the trunks or near disassembled machinery.
For kerosene, explore around gas stations or fuel depots; it's frequently stored in red canisters.
Rags are plentiful; inspect houses, barns, and other structures where clothing or fabric might be abandoned.
Once you acquire these materials, store them in your inventory for convenient access. Always double-check that you're carrying enough supplies before setting out. Being well-prepared not only guarantees success but also enables you to aid others who may require resources in the field.
Crafting Process Steps
Wondering how to craft the perfect Molotov cocktail? Follow these steps to secure you're ready to tackle sparrow nests efficiently.
First, gather the materials you need: a bottle, kerosene, and a rag.
- Combine Ingredients: Open your crafting menu and select the Molotov cocktail recipe. Place the bottle, kerosene, and rag into their respective slots.
- Mix Thoroughly: Secure the kerosene saturates the rag inside the bottle for maximum ignition potential.
- Finalize Craft: Confirm the combination and craft the Molotov cocktail. It will automatically be added to your inventory.
Effective Weapon Combinations
Now that you have your Molotov cocktails crafted, let's explore the best weapon combinations to effectively destroy sparrow nests.
First, equip your Molotov cocktails and a reliable firearm—preferably a shotgun for close encounters. Start by locating the sparrow nests, typically found in barns or on rooftops.
Throw a Molotov at the nest from a safe distance to ignite it. Immediately switch to your shotgun to fend off any attacking Freakers.
Navigate carefully as you approach the next nest, repeating the Molotov and shotgun combo. Always carry extra Molotovs and ammo to guarantee you can address all nests in one go.
Locating Sparrow Nests
To locate sparrow nests in Days Gone, head towards areas with dense foliage and listen for their distinct chirping sounds.
Follow these steps to pinpoint their locations:
- Scout Woodland Areas: Search zones rich in trees and bushes. Sparrows prefer nesting in places with plenty of cover.
- Use Binoculars: Equip your binoculars to spot nests in trees or high places. Keep an eye out for movement and nesting materials.
- Track Chirping: Move quietly and listen for their chirps. The louder the sound, the closer you are.
Stay vigilant, as nests can blend into the surroundings. Identifying these nests is the first step in your mission to clear them out and make the area safer for others.
Preparing for Combat

Once you've pinpointed the locations of the sparrow nests, gather your gear and ready yourself for the encounter ahead. Start by ensuring your weapons are fully loaded and in good condition. Pack extra ammunition, as you'll likely encounter resistance.
Equip yourself with protective clothing to minimize damage from attacks. Carry a medkit for quick healing if things get rough. Bring an assortment of throwable items, like grenades, to handle groups of enemies swiftly. Have a flashlight or headlamp to navigate dark areas.
Check your inventory for fuel and repair kits to keep your bike in top shape. Finally, mentally prepare for the task; a calm, focused mind will make all the difference in successfully destroying the nests.
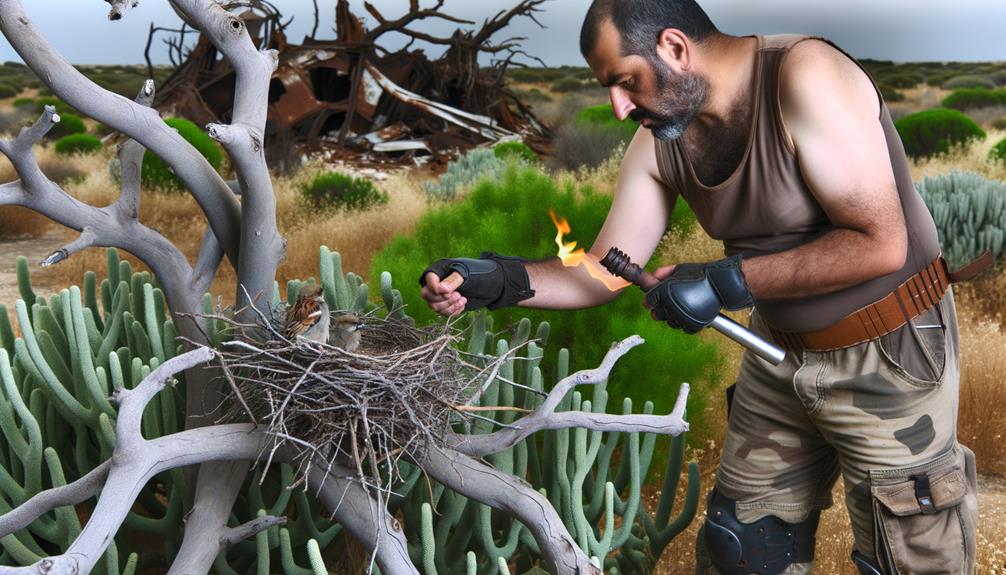
Using Molotov Cocktails
Equip a crafted Molotov cocktail from your inventory and make certain you have a clear line of sight to the sparrow nest before throwing it. This guarantees maximum effectiveness and avoids wasting valuable resources.
Follow these steps:
- Aim Carefully: Hold the aim button to get a precise throw. You don't want to miss and alert nearby enemies.
- Throw the Molotov: Release the throw button once you're confident in your aim. The Molotov will ignite the nest, causing it to burn and eventually be destroyed.
- Stay Alert: Immediately after throwing, be prepared for any sparrows that might attack. Keep your weapons handy to defend yourself.
Deploying Napalm Molotovs
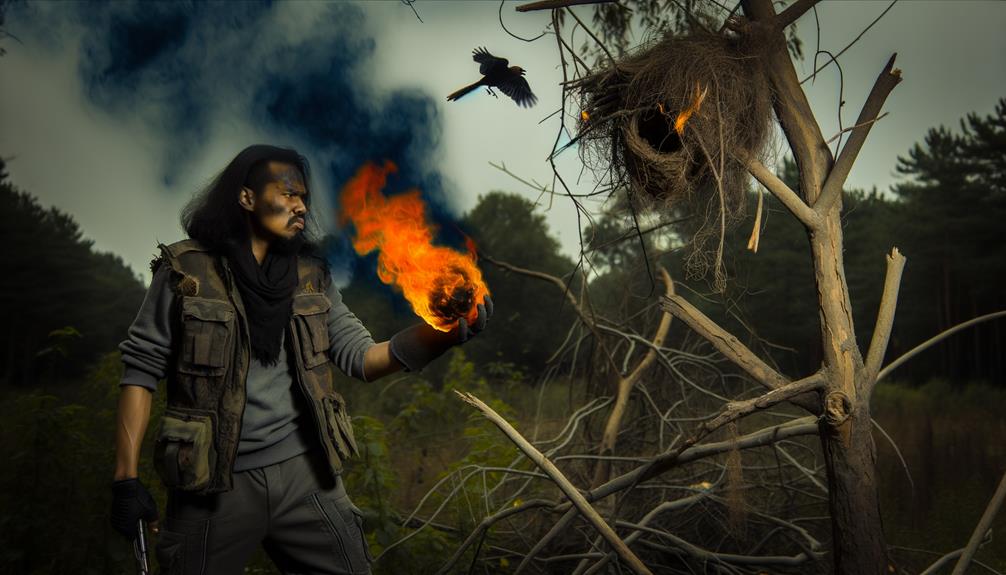
To effectively destroy sparrow nests, you'll first need to craft Napalm Molotovs by gathering the required materials: kerosene, a rag, and a growler.
Once equipped, locate the sparrow nests, which are often found in abandoned buildings or on highway overpasses.
Throw the Napalm Molotov directly at the nest, ensuring it catches fire and burns completely.
Crafting Napalm Molotovs
Gather the necessary materials—kerosene, a rag, and a beer bottle—to create a Napalm Molotov that will effectively burn sparrow nests. First, locate these items in your inventory or scrounged from the environment.
Next, follow these steps:
- Combine Kerosene and Rag: Open your crafting menu and blend the kerosene with the rag to produce a highly flammable mixture.
- Insert into Beer Bottle: Carefully pour the concoction into the beer bottle, making sure there's no leakage.
- Seal and Equip: Seal the bottle securely and equip it for immediate use.
This approach guarantees your Napalm Molotov is ready to deploy.
Locating Sparrow Nests
Start by surveying the area thoroughly to pinpoint the locations of sparrow nests, often found in tree branches, rooftops, and other elevated spots. Use binoculars to scan the surroundings and mark each nest you find on your map. Keep in mind that nests are typically grouped together, so finding one usually indicates there are more nearby.
| Task | Description |
|---|---|
| Surveying | Use binoculars to locate nests in trees and rooftops. |
| Mapping Locations | Record each nest's position on your map. |
| Identifying Clusters | Search for multiple nests in close proximity. |
Once you've identified all the nests, make sure you have enough napalm molotovs ready to deploy. Approach each nest carefully, staying vigilant to avoid attracting unwanted attention.
Effective Deployment Tactics
When you're prepared to deploy the napalm molotovs, position yourself at a safe distance from the nest and make certain you have a clear line of sight. Here's a step-by-step guide to guarantee you're effective and efficient:
- Aim Carefully:
Hold down the aim button to focus on the center of the nest. This secures the molotov will hit its target directly.
- Throw with Precision:
Press the throw button while maintaining your aim. A well-placed throw will maximize damage and start the fire.
- Observe and Retreat:
Watch the fire spread, making sure the nest is destroyed. Then, retreat to a safe location to avoid any angry sparrows.
Following these steps will help you serve others by keeping the area safe from pests.
Utilizing Crossbows Effectively
To utilize crossbows effectively, make sure you have a variety of bolt types ready to adapt to different situations. First, craft standard bolts for general use; these are your bread and butter.
For nests, equip incendiary bolts to burn them quickly. Approach quietly to avoid alerting any nearby Freakers. Aim carefully at the center of the nest and release the bolt. Watch as it ignites, ensuring complete destruction.
Keep your crossbow maintained and always carry extra materials for crafting bolts. Practice your aim in safer areas to build confidence.
Clearing Surrounding Freakers
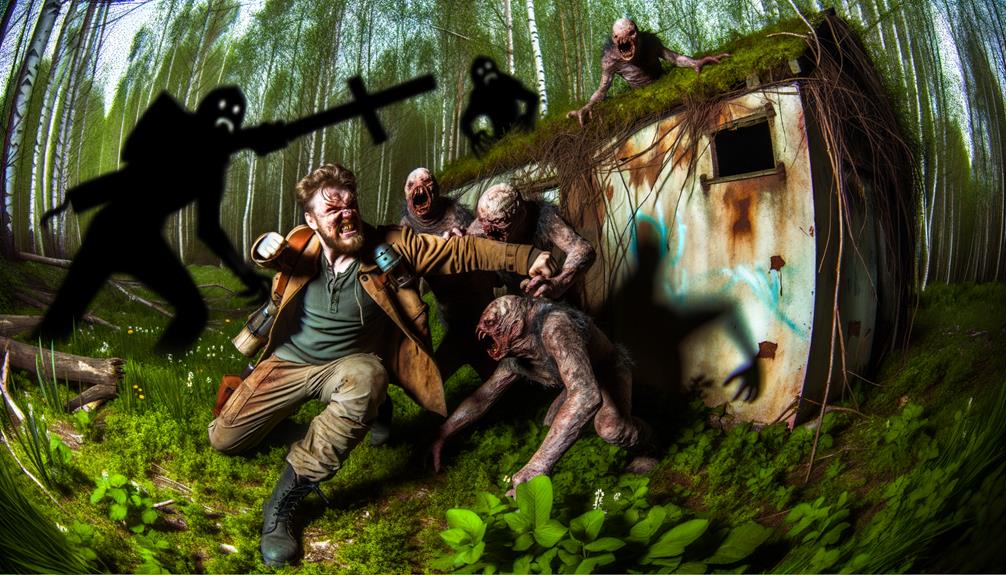
Before you engage the nests, make sure to clear out any Freakers in the vicinity to prevent them from swarming you. Follow these steps for a smooth process:
- Scout the Area: Use your binoculars to identify Freaker locations. Mark them to keep track of their movements.
- Silent Takedowns: Use a suppressed weapon or a melee attack to quietly eliminate Freakers one by one. This helps you avoid attracting more enemies.
- Distraction Tactics: Throw rocks or set off distractions like car alarms to lure Freakers away from the nests. This creates a safer pathway for you to approach.
Timing Your Attacks
Timing your attacks is crucial to ensure you destroy the nests efficiently without being overwhelmed by Freakers. First, plan your attack during daylight when Freakers are less active. Approach the nests quietly, avoiding unnecessary noise that could attract unwanted attention. Use the Molotov cocktails to ignite the nests quickly, then back away to a safe distance. Monitor your surroundings constantly to stay aware of any approaching Freakers.
Here's a quick reference table for timing your attacks:
| Time of Day | Freaker Activity | Suggested Action |
|---|---|---|
| Day | Low | Attack nests |
| Dusk | Medium | Be cautious, reduce noise |
| Night | High | Avoid nest destruction |
Post-Destruction Cleanup
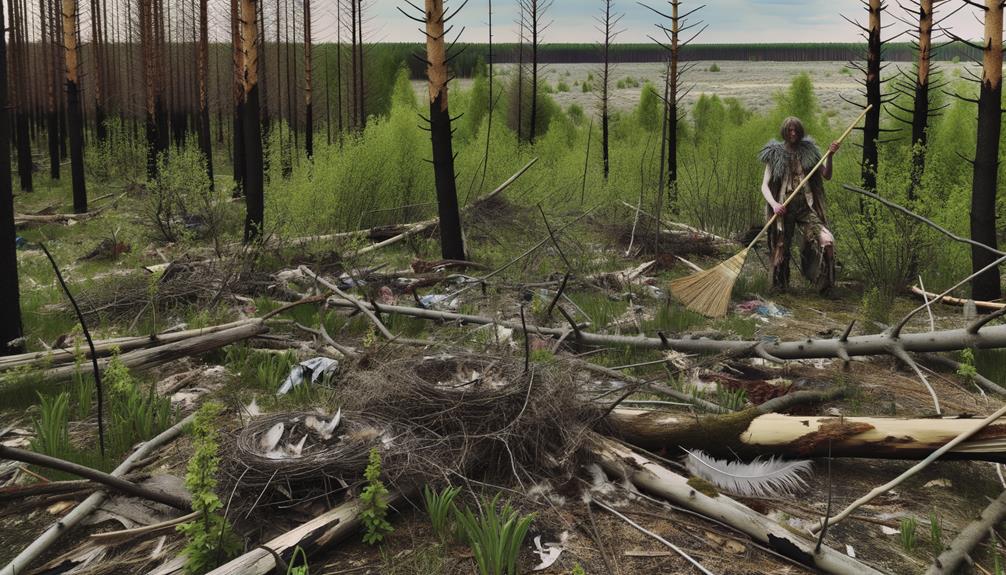
After successfully destroying the nests, immediately scan the area for any straggling Freakers or threats before starting your cleanup. Once the area is secure, follow these steps to guarantee a thorough cleanup:
- Collect Residual Materials:
Gather any remaining nest materials and dispose of them properly to prevent attracting more Freakers.
- Check for Loot:
Look for any items or resources left behind by enemies or within the nests. These can be useful for crafting and survival.
- Inspect Surroundings:
Survey the vicinity for any damage caused during the destruction process and make necessary repairs.
Preventing Nest Rebuilding
To prevent nests from being rebuilt, immediately barricade potential nesting sites using sturdy materials and make sure all entry points are securely blocked. Start by identifying common nesting areas such as eaves, vents, and gaps in siding.
Use wire mesh or hardware cloth to cover these spaces. Secure the mesh with screws or heavy-duty staples to guarantee it stays in place. For larger openings, consider using wood or metal panels.
Regularly inspect these barriers for any signs of wear or tampering. Additionally, trim any overhanging branches or vegetation that sparrows might use to access these areas.
Conclusion
You've done it! By following these steps, you've dismantled the sparrow nests like a pro. Picture it like peeling back layers of an onion, each step revealing the next until the job's complete.
Remember to keep an eye out for any rebuilding efforts and act swiftly to prevent them. You've got the know-how now, so stay vigilant and keep those nests from popping back up.
Your dedication guarantees a safer environment in Days Gone.