10 Steps to Get Sparrows Out of House Walls Safely
To remove sparrows from house walls, start by identifying entry points such as gaps, cracks, or vents around eaves and rooflines. Inspect using a flashlight during different lighting conditions.
Listen for chirping and rustling noises to assess infestation. Gather inspection tools, safe removal equipment, and post-removal supplies.
Seal off entry points using caulk, steel wool, or hardware cloth and cover vents with bird-proof mesh. Use bird repellents like ultrasonic devices and natural deterrent sprays.
Set traps with seeds, and gently remove nests. Clean and disinfect the area thoroughly.
To make sure you address all aspects and prevent future infestations, follow these detailed steps.
Key Takeaways
- Identify and seal all entry points such as cracks, gaps, and vents around eaves, soffits, and rooflines.
- Use humane traps baited with seeds or grains to capture sparrows near their entry points.
- Employ ultrasonic sound devices and natural deterrent sprays to repel sparrows from nesting in the walls.
- Carefully remove nests by creating small access points and gently extracting nests and any remaining birds or eggs.
- Clean and disinfect the area using a HEPA filter vacuum and a bleach solution to prevent future infestations.
Identify Sparrow Entry Points
Begin by meticulously examining the exterior of your home to pinpoint any gaps, cracks, or openings that sparrows could potentially use as entry points. Focus on areas around eaves, vents, soffits, and rooflines, as these are common ingress sites for small birds.
Pay particular attention to any spaces where utility lines enter the building and around windows and doors. Utilize a flashlight to inspect under eaves and other shadowed areas. It may be beneficial to conduct this examination during both daylight and dusk hours, as varying light conditions may reveal different vulnerabilities.
Document all identified points of entry, noting their specific locations and dimensions, to guarantee a thorough sealing plan. This initial step is important for effective sparrow exclusion.
Assess the Extent of Infestation
To accurately assess the extent of the sparrow infestation within your walls, start by listening for chirping sounds and rustling noises, especially during dawn and dusk when these birds are most active. Next, inspect the exterior walls for visible signs such as droppings, feathers, and nesting materials. Utilize a flashlight to peer into any gaps or holes. Document your findings systematically for a thorough understanding.
| Inspection Area | Signs to Look For | Tools Needed |
|---|---|---|
| Exterior Wall Surfaces | Droppings, feathers | Flashlight, binoculars |
| Wall Cavities/Crevices | Nesting materials, movement | Flashlight |
| Attic & Basement | Noise, nests | Flashlight |
| Vent Openings & Eaves | Entry points, nesting materials | Ladder, flashlight |
This structured assessment will help you determine the severity of the infestation and plan the next steps effectively.
Gather Necessary Tools
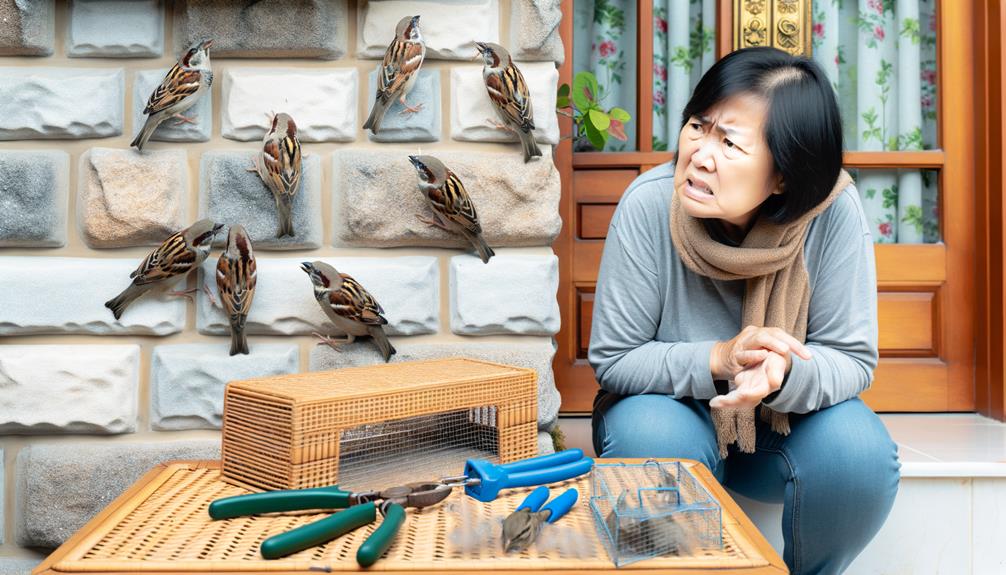
To efficiently address the removal of sparrows from house walls, it is essential to gather the appropriate tools. Begin with inspection tools such as flashlights and endoscopic cameras to assess the infestation.
Equip yourself with safe removal equipment, including protective gloves and humane traps, as well as post-removal supplies like sealants and disinfectants to prevent future infestations.
Inspection Tools Needed
Proper examination of sparrow infestations within house walls necessitates a set of specialized tools to guarantee a thorough and effective evaluation. Accurate identification of entry points, nesting sites, and potential damage is paramount.
The following tools are essential for a thorough assessment:
- Inspection Camera: A flexible borescope or endoscope camera allows for visual inspection within wall cavities, identifying nesting sites without invasive demolition.
- Flashlight: A high-lumen flashlight aids in examining dark and hard-to-reach areas, ensuring visibility of any sparrow activity or nesting materials.
- Ladder: A sturdy, adjustable ladder is necessary for accessing high or difficult-to-reach entry points on the exterior of the house.
Utilizing these tools guarantees a precise and effective inspection, critical for addressing sparrow infestations.
Safe Removal Equipment
Securing the safe removal of sparrows from house walls demands a complete set of tools crafted for humane extraction and minimizing structural damage. Necessary equipment includes:
- a ladder for accessing elevated areas safely
- a flashlight for illuminating dark spaces
- protective gloves to prevent injuries
Utilize a small, extendable mirror to inspect confined spaces thoroughly. A humane sparrow trap, such as a net or a box trap, is essential for capturing the birds without harm. Additionally, a gentle vacuum with a soft brush attachment can assist in safely coaxing sparrows out.
Post-Removal Supplies
After successfully removing sparrows from house walls, it is essential to gather specific post-removal supplies to restore the area and prevent future infestations. Proper tools and materials guarantee the space is sealed and clean, deterring sparrows from returning.
The following items are recommended:
- Sealant and Caulking Gun: Use high-quality sealant to close any entry points. A caulking gun guarantees an even application, providing a durable barrier.
- Wire Mesh and Screws: Install wire mesh over larger gaps or vents to allow ventilation while preventing sparrow access. Secure it with screws for robustness.
- Disinfectant and Cleaning Supplies: Clean the affected area thoroughly with a strong disinfectant to eliminate any remnants of nesting material, droppings, or parasites.
Gathering these supplies guarantees a thorough and lasting solution.
Seal Off Entry Points
Identifying and sealing off all potential entry points is crucial in preventing sparrows from nesting within the walls of your house. Begin by conducting a thorough inspection of the exterior, focusing on areas around vents, eaves, soffits, and any gaps or cracks in the siding.
Utilize materials such as caulk, steel wool, or hardware cloth to close off these openings effectively. Make sure that all ventilation points are covered with bird-proof mesh to allow airflow while keeping sparrows out. Additionally, check for any damaged or loose shingles and repair them promptly.
Regular maintenance and vigilance are critical in ensuring that new entry points do not develop over time, thereby safeguarding your home from future infestations.
Use Bird Repellents
Employing bird repellents can be an effective strategy to deter sparrows from nesting within your walls.
Ultrasonic sound devices emit high-frequency noises that are irritating to birds but inaudible to humans, thereby encouraging the sparrows to vacate the area.
Additionally, natural deterrent sprays containing ingredients such as peppermint oil can be applied to potential entry points to create an unwelcoming environment for the birds.
Ultrasonic Sound Devices
Utilizing ultrasonic sound devices can be an effective method for repelling sparrows from house walls. These devices emit high-frequency sounds that are intolerable to birds but inaudible to humans. These devices can be strategically placed around the affected areas to uphold a sparrow-free environment.
Here are three essential considerations:
- Placement: Position the device near entry points or nesting areas within the walls to target the birds directly.
- Frequency Settings: Adjust the frequency range to guarantee it is optimized for sparrows, as different birds may react to varying frequencies.
- Maintenance: Regularly check and maintain the device to secure it remains functional and effective over time.
Natural Deterrent Sprays
While ultrasonic sound devices offer a technological solution, natural deterrent sprays provide an eco-friendly alternative for discouraging sparrows from nesting within house walls. These sprays utilize ingredients such as peppermint oil, garlic, and vinegar, which are unpleasant to birds but safe for humans and pets.
To apply, thoroughly clean the area to remove any existing nests or debris. Then, spray the deterrent generously around potential entry points, such as cracks and crevices. Reapply the spray weekly or after rain to maintain its efficiency.
For best results, combine this method with other deterrents, such as physical barriers or visual scare devices, to create a thorough bird control strategy. This multi-pronged approach ensures that sparrows are effectively discouraged from nesting.
Install One-Way Doors
To effectively remove sparrows from house walls without allowing them back inside, install one-way doors designed specifically for small birds. These devices allow the sparrows to exit but prevent reentry, guaranteeing they do not become trapped inside your walls.
Follow these steps for proper installation and best results:
- Identify Entry Points: Locate all the holes or gaps where sparrows are entering your house walls. This step is essential to secure that no bird becomes trapped during the process.
- Select Proper One-Way Doors: Choose doors that are appropriately sized for sparrows. Guarantee they are durable and weather-resistant.
- Install and Monitor: Securely attach the one-way doors over the identified entry points. Monitor the area to confirm sparrows are exiting and not reentering.
Utilize Sound Deterrents
To effectively repel sparrows from house walls, sound deterrents such as high-frequency sound emitters, ultrasonic repellent devices, and noise-making gadgets can be strategically employed.
These devices create an auditory environment that is unpleasant for sparrows, encouraging them to vacate the area.
Proper placement and consistent usage are essential for maximizing the effectiveness of these sound deterrents.
High-frequency Sound Emitters
High-pitched sound emitters serve as an efficient and humane method for discouraging sparrows from nesting within house walls, leveraging their acute sensitivity to specific sound frequencies. These devices emit sounds that are irritating to birds but generally inaudible to humans, thereby encouraging the sparrows to vacate the area without causing harm.
When implementing high-pitched sound emitters, consider the following steps:
- Placement: Install the emitters near entry points and potential nesting sites within the walls to maximize their effectiveness.
- Settings: Adjust the frequency and volume settings according to manufacturer recommendations to ensure optimal deterrence.
- Maintenance: Regularly check and maintain the devices to ensure continuous operation and effectiveness, as sparrows may return if the sound emitters become inactive.
Ultrasonic Repellent Devices
Ultrasonic repellent devices, which utilize sound deterrents, offer another technological solution for preventing sparrows from nesting within house walls by emitting frequencies above the range of human hearing. These devices are designed to produce ultrasonic waves that are intolerable for birds but inaudible to humans, thereby creating an inhospitable environment for sparrows.
To maximize effectiveness, place the ultrasonic repellent device near known entry points or nesting areas, ensuring it covers the entire affected space. It is vital to select a device with adjustable frequency settings to prevent habituation. Regularly monitor the device's functionality and replace batteries as needed.
Integrating ultrasonic repellents with other exclusion methods can yield more robust results in deterring sparrows.
Noise-Making Gadgets
When addressing the challenge of sparrows nesting in house walls, noise-making gadgets that utilize sound deterrents provide an effective and humane solution. These devices work by emitting sounds that are unpleasant to sparrows, encouraging them to vacate the area without causing harm.
To implement this method, consider the following steps:
- Select a Sound Deterrent Device: Choose a gadget specifically designed to emit distress calls or predator sounds that sparrows find threatening.
- Install the Device Near Nesting Areas: Position the device in proximity to where sparrows have nested or are likely to nest, making sure it covers the entire problematic area.
- Monitor and Adjust Settings: Regularly check the device's effectiveness and adjust sound frequencies or volumes as needed to maintain deterrence.
This strategic approach helps sparrows relocate, protecting your home humanely.
Set Up Sparrow Traps
To effectively set up sparrow traps, begin by selecting a suitable location where sparrows are frequently observed entering or exiting the walls. Positioning the traps near these entry points maximizes the likelihood of capturing the birds. Guarantee the traps are baited with seeds or grains sparrows find attractive. Monitor the traps regularly to secure humane treatment and prompt removal of captured sparrows.
| Step | Description |
|---|---|
| 1 | Identify entry/exit points |
| 2 | Choose appropriate traps |
| 3 | Bait traps with seeds or grains |
| 4 | Regularly check and maintain traps |
Additionally, opt for traps designed specifically for small birds to prevent harm. Proper placement and diligent monitoring are essential in securing an effective and humane sparrow removal process.
Remove Nests Carefully
Carefully removing sparrow nests from house walls requires meticulous attention to avoid causing harm to the birds or structural damage to the property. Begin by identifying and marking the exact location of the nest to guarantee precision. Use appropriate tools, such as a flashlight and a small mirror, to inspect the nest's placement within the walls.
Follow these steps meticulously:
- Gently Access the Nest: Create a small access point, avoiding major structural components, using a drill or similar tool.
- Carefully Extract the Nest: Use gloved hands or gentle tools like tongs to eliminate the nest, ensuring minimal disturbance.
- Check for Remaining Birds: Inspect thoroughly to guarantee no birds or eggs are left behind.
These steps guarantee safe and effective nest removal.
Clean and Disinfect Area
Thoroughly clean the vacated area using a vacuum with a HEPA filter to remove any debris, feathers, or droppings left behind. This guarantees that all particulate matter is captured effectively, reducing potential allergens and contaminants. Following the vacuuming, disinfect the area with a solution of water and a strong disinfectant, such as bleach, at a ratio of 1:10. This step is crucial to eliminate pathogens and bacteria that may linger. Allow the area to dry completely before further inspection or repair.
| Step | Equipment Needed | Detailed Action |
|---|---|---|
| Vacuuming | HEPA-filter vacuum | Remove debris, feathers, and droppings |
| Disinfection | Bleach, water, spray bottle | Mix and apply 1:10 bleach solution |
| Drying | Fans or dehumidifiers | Ensure area is thoroughly dried |
| Inspection | Flashlight | Check for residual contamination |
| Final Check | Protective gloves | Re-clean if necessary |
This meticulous process guarantees a sanitary environment post-infestation.
Prevent Future Infestations
Ensuring that sparrows do not return to nest within your walls involves several preventative measures that address potential entry points and attractants. Implementing these steps will help safeguard your property against future infestations:
- Seal Entry Points:
Inspect the exterior of your home for cracks, gaps, and holes. Use caulk or expanding foam to seal these openings, ensuring there are no gaps larger than 1/2 inch.
- Install Bird Netting:
Apply bird netting or wire mesh over vents, chimneys, and other susceptible areas to prevent sparrows from gaining access.
- Remove Food Sources:
Keep the area around your house free from bird feeders, pet food, and uncovered trash, which may attract sparrows seeking nourishment.
These measures will greatly reduce the likelihood of re-infestation.
Conclusion
To sum up, dealing with sparrow infestations in house walls necessitates precise identification of entry points, comprehensive evaluation of the infestation's scope, and the strategic application of tools and repellents.
The meticulous removal of nests, coupled with thorough cleaning and disinfection, is crucial to uphold a healthy environment.
Ultimately, implementing proactive measures to deter future infestations guarantees long-term protection.
As the saying goes, 'Prevention is better than cure,' highlighting the importance of proactive steps in protecting one's home.

