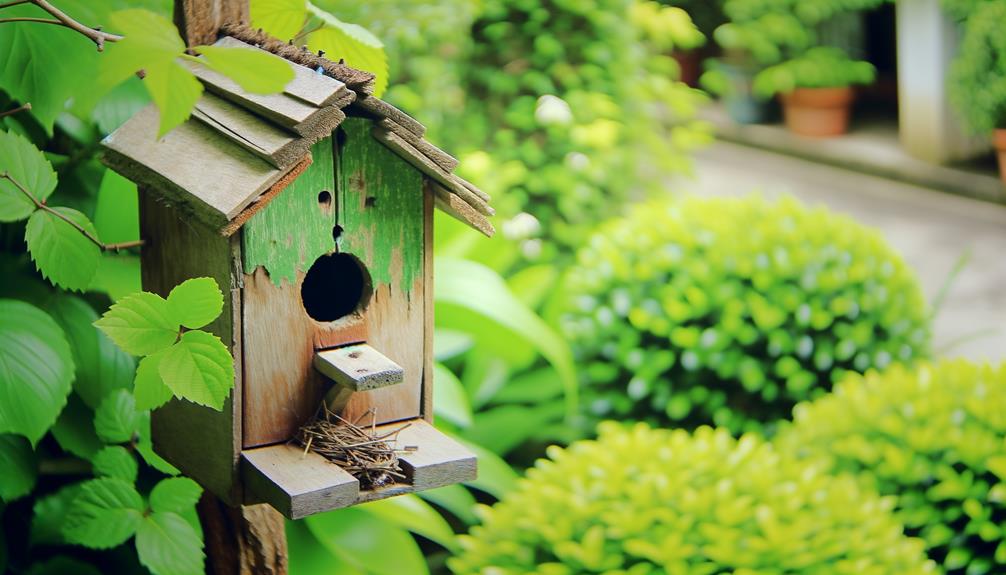
5 Easy Steps to Make a Sparrow Nest Box from a Shoebox
To make a sparrow nest box from a shoebox, gather a sturdy shoebox, non-toxic glue, a small saw, sandpaper, weatherproof paint, and hinges. Mark and cut a small entrance hole, then sand the edges.
Add ventilation holes and reinforce the box with extra cardboard strips. Attach perches.
Paint the box with weatherproof paint. Secure the roof flap with hinges and seal with glue.
Choose a quiet, elevated location, mount the box on a pole or tree trunk, ensuring stable and proper orientation. For more precise steps and proper installation tips, continue below.
Key Takeaways
- Cut an entrance hole in the shoebox using a small hand saw or craft knife.
- Reinforce the shoebox with cardboard strips and panels for added durability.
- Drill ventilation holes to ensure proper airflow within the nest box.
- Secure the lid with non-toxic glue, nails, or screws, and weatherproof the roof with a sealant.
- Mount the nest box at a suitable height in a quiet, sheltered location, away from strong winds and human activity.
Gather Your Materials

To build a sparrow nest box from a shoebox, you'll need several specific materials to make certain the structure is both functional and safe for the birds. First, get a sturdy shoebox with a lid. Make sure it's clean and dry.
You'll also need non-toxic glue to assemble parts securely. Use a ruler and pencil for precise measurements. A small hand saw or craft knife will help you cut openings. Include sandpaper to smooth rough edges, preventing harm to the birds.
You'll need weatherproof paint for exterior protection and ventilation holes. Gather a small mesh or screen to cover these holes, keeping predators out. Finally, collect natural materials like straw or dry grass for nesting.
Prepare the Shoebox
Start by measuring and marking a 1.5-inch diameter entrance hole on one side of the shoebox, making sure it's positioned about 2 inches from the top. This precise placement helps maintain the structural integrity of the box while providing an ideal entry point for sparrows. Use a compass or a round object as a guide to achieve an accurate circle.
Next, reinforce the inside of the box with additional cardboard strips along the edges. This step increases durability and stability. Be certain to tape these strips securely.
Cut Entrance Hole
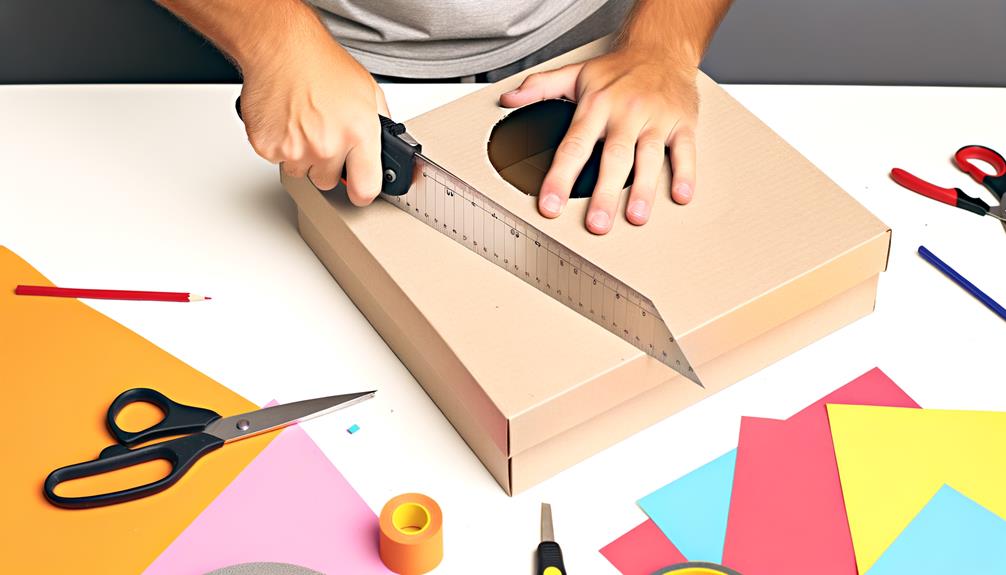
To cut the entrance hole, start by choosing a diameter of about 1.5 inches to suit sparrows' size.
Carefully cut the hole using a sharp utility knife, ensuring precision.
After cutting, smooth out the edges with sandpaper to prevent injury to the birds.
Choose Appropriate Size
When selecting the entrance hole's size, consider that sparrows typically require a diameter of 1.25 inches to make sure they can enter comfortably while deterring larger birds.
Measure and mark the position for the entrance, ideally centered near the top of one side of the shoebox. Use a ruler to guarantee accuracy. Precision is crucial because a hole too large may invite predators or other bird species, while a hole too small could prevent sparrows from accessing the nest box.
Carefully cut the entrance hole using a sharp utility knife or hole saw. Ensure the cut is clean and precise to maintain structural integrity.
Your attention to these details will create a safe, welcoming environment for sparrows.
Smooth Out Edges
Secure the edges of the entrance hole are smooth and free from any jagged bits that could harm the sparrows or compromise the nest box's integrity. Use fine-grit sandpaper to meticulously smooth out the cut edges. Hold the shoebox firmly, and apply gentle, even pressure as you sand. Inspect the hole closely, making certain there are no sharp protrusions.
| Material | Tool Needed | Action Required |
|---|---|---|
| Shoebox | Pencil | Mark entrance hole location |
| Shoebox | Utility knife | Cut entrance hole |
| Shoebox | Fine-grit sandpaper | Smooth entrance hole edges |
| Shoebox | Ruler | Measure hole dimensions |
| Shoebox | Safety gloves | Protect hands during sanding |
This careful preparation guarantees a safe, welcoming environment for the sparrows, promoting their well-being and encouraging nesting.
Create Ventilation Holes
Ensuring proper airflow, use a small drill bit to create evenly spaced ventilation holes around the upper perimeter of the shoebox. Aim for holes approximately 1/4 inch in diameter and space them about 1 inch apart. This specific spacing guarantees sufficient air circulation while preserving the box's structural integrity.
Proper ventilation is essential to prevent overheating and to promote a healthy environment for the sparrows. Hold the drill steady to avoid tearing the cardboard. For consistency, you might pre-mark the hole positions with a pencil.
Reinforce the Box
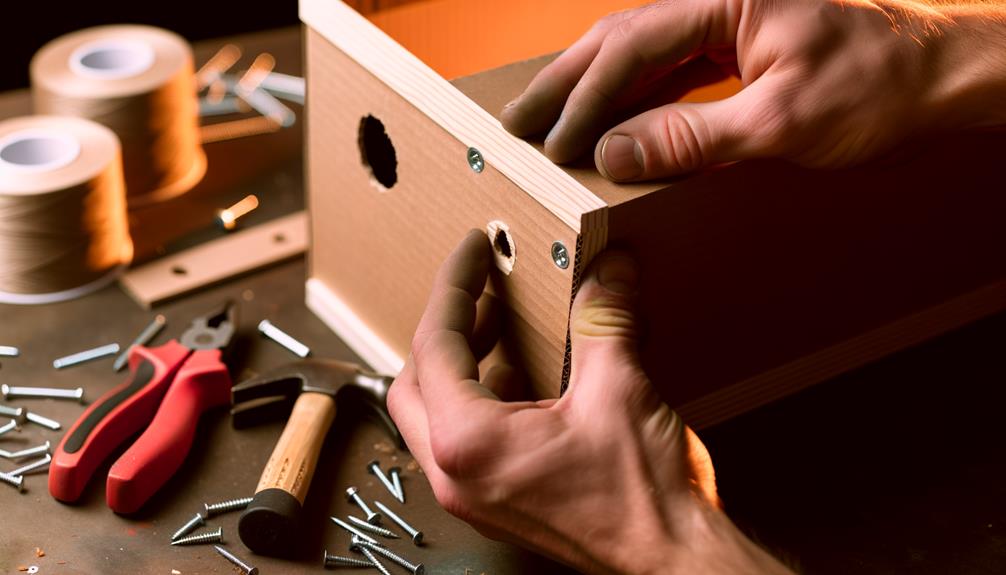
To confirm the nest box is sturdy and durable, first, reinforce it with additional cardboard panels. Secure these panels using a strong adhesive to prevent any movement.
Strengthen With Cardboard Panels
Reinforcing the shoebox with additional cardboard panels involves cutting and fitting pieces to the interior walls, ensuring the nest box maintains its structural integrity. You need to measure each side of the shoebox to create precise cardboard inserts. These inserts will bolster the box, making it more durable for sparrow habitation.
To achieve this, follow these steps:
- Measure and Cut: Accurately measure the dimensions of each interior wall and cut the cardboard panels accordingly.
- Fit and Test: Place the panels inside the box to check the fit, ensuring they lie flush against the walls.
- Mark and Adjust: Use a pencil to mark any adjustments needed and trim the panels for a perfect fit.
These steps will reinforce the shoebox effectively.
Secure With Strong Adhesive
Apply a strong adhesive, such as epoxy or industrial-strength glue, to the edges of the cardboard panels to firmly affix them to the shoebox walls. Make sure you distribute the adhesive evenly to create a strong bond.
Press each panel into place and hold it for a few minutes to facilitate proper adhesion. You might need to use clamps or heavy objects to maintain pressure while the adhesive sets.
This step is essential to prevent any structural weakness that could jeopardize the safety of the sparrow nest. By taking the time to meticulously secure the panels, you're ensuring a stable, durable environment for the birds.
Your precision and care in this stage reflect your dedication to providing a safe habitat.
Add Protective Coating
Securing the shoebox is weather-resistant and durable, you'll need to apply a protective coating to the exterior surfaces. This step is crucial to prolong the lifespan of the nest box and safeguard it against harsh weather conditions.
Follow these steps to reinforce the box:
- Choose a Waterproof Sealant: Select a non-toxic, bird-safe waterproof sealant. This guarantees that the coating won't harm the sparrows.
- Apply Even Coats: Utilize a brush to apply an even layer of the sealant. Make sure you cover all exterior surfaces, including edges and corners.
- Allow Adequate Drying Time: Let the sealant dry completely according to the manufacturer's instructions. Typically, this takes 24-48 hours.
Add Perches
Attach a small wooden dowel or twig just below the entrance hole to provide a perch for the sparrows. Measure about 2-3 centimeters beneath the entrance.
Drill a hole slightly smaller than the dowel's diameter to guarantee a snug fit. Insert the dowel or twig into the hole, applying a small amount of non-toxic glue to secure it in place.
This perch will aid the sparrows in entering and exiting the nest box, offering them a place to rest momentarily. Making sure the perch is sturdy and well-fixed is essential; a loose perch may deter sparrows from using the nest box.
Your attention to these details helps create a welcoming and functional home for your feathered friends.
Paint the Box
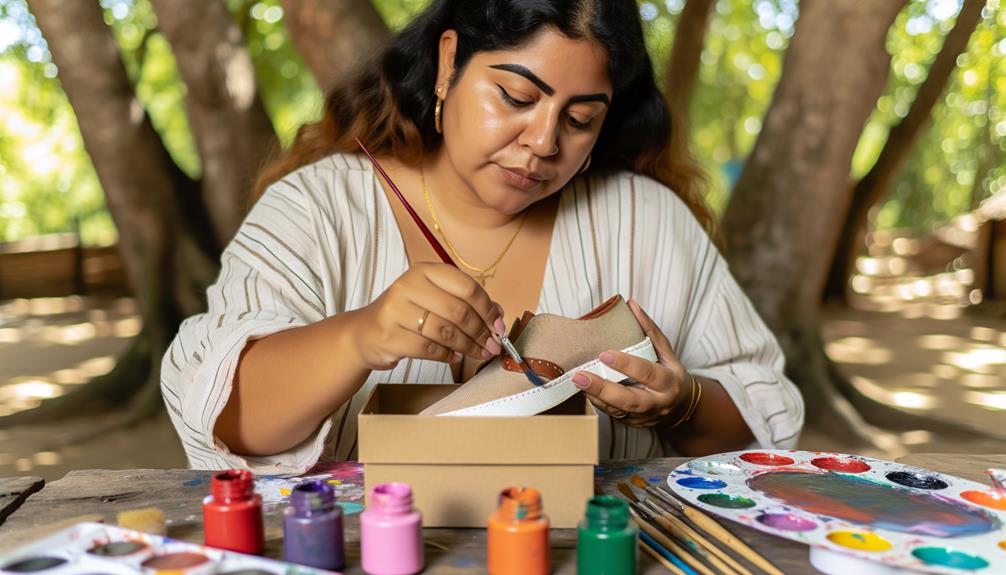
To protect the shoebox nest from the elements and enhance its appearance, choose a weather-resistant, non-toxic paint in a natural hue that blends with the surroundings. This step is vital to guarantee the longevity of the nest box and the safety of its inhabitants.
Follow these steps to paint your nest box:
- Prepare the Surface: Gently sand the shoebox to eliminate any debris or uneven areas. This ensures the paint adheres properly.
- Apply Primer: Use a primer suitable for cardboard to establish a smooth base for the paint. Allow it to dry completely.
- Paint: Apply the non-toxic, weather-resistant paint evenly. Use multiple thin layers instead of one thick layer for better coverage and durability. Allow each layer to dry completely.
Install Roof Flap
When you install the roof flap, first secure it firmly to guarantee stability.
Weatherproof the roof using a waterproof sealant to safeguard the nest from rain.
Attach the hinges properly to allow easy access for cleaning while maintaining structural integrity.
Secure Roof Flap
Before verifying the roof flap, measure and cut it to affirm it fits snugly over the top of the shoebox, providing adequate protection from the elements.
To secure the roof flap, follow these steps:
- Attach Hinges: Utilize small hinges to connect one side of the flap to the shoebox. This allows easy access for cleaning and monitoring.
- Add a Fastener: Install a small latch or hook on the opposite side to keep the flap securely closed, preventing predators from gaining entry.
- Seal Edges: Apply a thin bead of non-toxic glue along the edges where the flap meets the box to guarantee a tight seal.
Weatherproofing the Roof
Once you've secured the roof flap, apply a waterproof sealant to the entire surface to protect the nest box from moisture and extend its durability.
Begin by choosing a non-toxic, bird-safe sealant. Using a paintbrush, evenly coat the top and edges of the roof flap. Make sure you cover any seams or joints meticulously to prevent water infiltration.
Allow the first layer to dry according to the manufacturer's instructions, typically 24 hours. For best protection, apply a second coat, ensuring thorough, even coverage.
This step is vital for maintaining the integrity of the shoebox material, especially in varying weather conditions. By meticulously sealing the roof, you're enhancing the longevity of the nest box, providing a safe, dry habitat for sparrows.
Attaching Hinges Properly
To secure the roof flap functions smoothly and remains secure, start by selecting sturdy, rust-resistant hinges that can withstand outdoor conditions. Follow these precise steps to confirm a proper installation:
- Mark Hinge Positions: Align the hinges evenly along the back edge of the shoebox lid and corresponding box edge. Use a pencil to mark where the screws will go.
- Pre-drill Holes: Using a drill bit slightly smaller than your screws, pre-drill holes at the marked positions. This prevents the cardboard from tearing and confirms a snug fit.
- Attach Hinges: Secure the hinges to both the lid and the shoebox using rust-resistant screws. Tighten the screws firmly but avoid over-tightening to prevent damaging the cardboard.
Secure the Lid

Carefully align the shoebox lid with the box to secure a proper fit and prevent any gaps. This alignment is essential to guarantee the nest box remains weather-resistant and provides a safe environment for sparrows. Use a ruler to check the consistency of the edges.
Once aligned, apply a strong adhesive such as wood glue along the inner perimeter of the lid. Press firmly to bond the lid and box, holding it in place for a few minutes. For additional security, you can use small nails or screws, placing them at each corner and along the sides. Make sure they're evenly spaced to distribute the pressure and avoid warping.
This detailed approach will secure the nest box remains durable and protective.
Choose a Location
With the nest box firmly assembled, you need to select a location that offers both safety and ideal conditions for sparrows to thrive. To guarantee the best environment, consider the following:
- Height: Place the nest box at least 10-15 feet above the ground. This minimizes the risk from ground predators and provides a secure vantage point for sparrows.
- Orientation: Face the entrance hole away from prevailing winds, usually towards the east or southeast. This helps safeguard the nest from harsh weather conditions.
- Surroundings: Choose a quiet area with minimal human activity and ample shelter like trees or shrubs nearby. These provide natural cover and foraging opportunities for the birds.
Mount the Nest Box
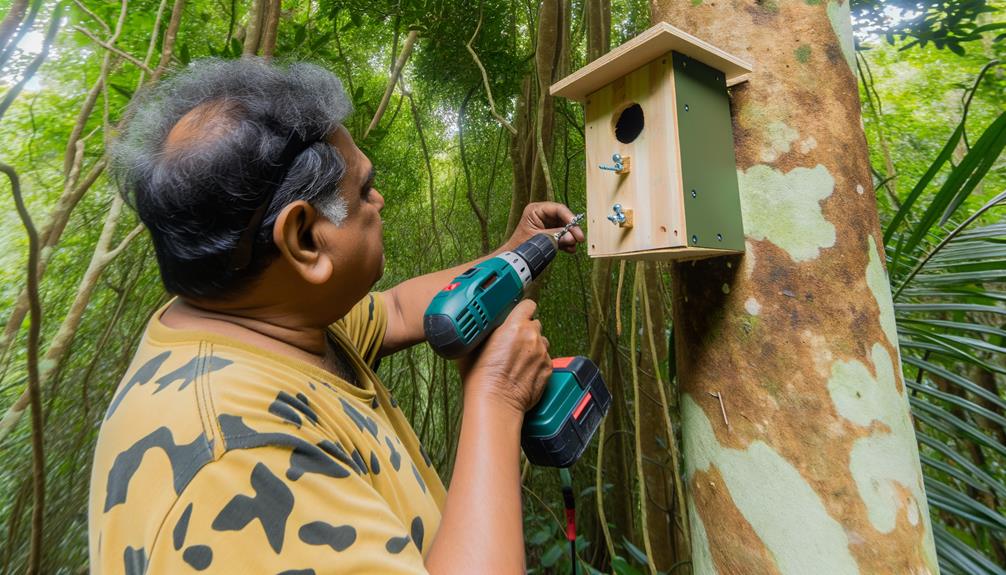
Securing stability and security, mount the nest box on a sturdy pole or tree trunk using weather-resistant screws or straps. Position the box at least 6 to 8 feet above ground to deter predators and provide a safe environment for sparrows. Make sure the entrance hole faces away from prevailing winds to protect the birds from harsh weather. Always verify that the mounting surface is firm and the box is level.
| Step | Materials Needed | Tips |
|---|---|---|
| Attach the Box | Screws or Straps | Use weather-resistant varieties |
| Positioning Height | Ladder | 6-8 feet above ground |
| Orienting Entrance Hole | Compass | Away from prevailing winds |
Follow these steps diligently to improve the nesting success for sparrows.
Maintain the Nest Box
Regular maintenance of your sparrow nest box is essential to guarantee a healthy and safe environment for the birds. Here's how to keep it in top condition:
- Inspect Regularly:
Check the box every couple of weeks for signs of wear, damage, or pests. Look for cracks, mold, or any unwanted guests that might compromise the nest's safety.
- Clean Seasonally:
After the nesting season, remove old nesting material to prevent disease. Use a mild detergent and water, then let it air dry completely before reassembling.
- Reapply Waterproofing:
To extend the nest box's lifespan, reapply a non-toxic waterproof sealant annually. This prevents water damage and keeps the interior dry and habitable for sparrows.
Conclusion
By following these steps, you'll gather materials, prepare the shoebox, cut the entrance hole, create ventilation, reinforce the box, secure the lid, choose a location, mount the nest box, and maintain it with ease. Each action guarantees a safe, durable, and inviting home for sparrows.
Your precise efforts not only foster bird conservation but also deepen your connection to nature. Enjoy observing the new avian visitors, confident in the knowledge that you've made a difference.