5 Simple Steps to Make a Sparrow House from a Shoebox
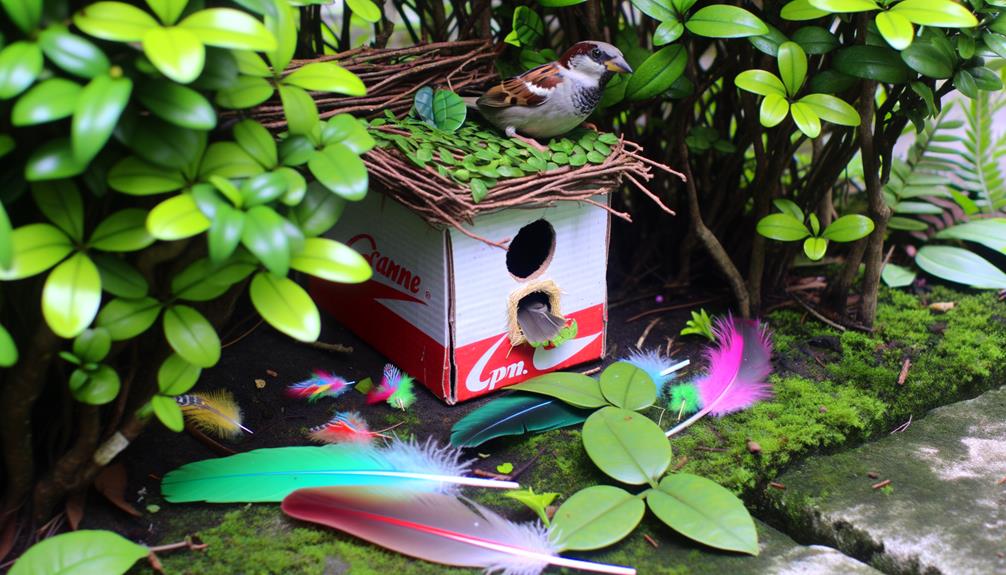
To craft a sparrow house from a shoebox, you'll need a sturdy shoebox, a utility knife, non-toxic glue, bird-safe paint, and mesh netting. First, mark and cut a 1.5-inch diameter entrance hole, positioned 1 inch from the top.
Add ventilation holes near the top for airflow. Secure the shoebox lid using non-toxic glue, ensuring water-resistance.
Reinforce the edges with dowels for added stability and leave small gaps for ventilation. Decorate the box with bird-safe paint, and place the house in a safe, sheltered location.
For a detailed, step-by-step process, keep following this guide.
Key Takeaways
- Mark and precisely cut a 1.5-inch entrance hole 1 inch from the top edge of the shoebox.
- Strategically place and cut ventilation holes near the top for efficient airflow and heat escape.
- Secure the roof with non-toxic glue, ensuring a snug fit and small gaps for ventilation.
- Reinforce the shoebox corners and edges with dowels and sealant for structural integrity and water resistance.
- Use bird-safe paint and mesh/netting to protect the sparrow house from weather and predators.
Gather Your Materials
To begin crafting a sparrow house from a shoebox, make sure that you have gathered all necessary materials, including:
- A sturdy shoebox, designed to withstand various weather conditions.
- A utility knife for precise cutting to ensure clean edges.
- Non-toxic glue to guarantee the safety of the sparrows by avoiding harmful chemicals.
- Bird-safe paint for the exterior, providing both aesthetic appeal and protection without risking toxicity.
- A small piece of mesh or netting for ventilation and to prevent predators from entering.
Each of these materials plays a critical role in constructing a safe and functional sparrow house.
Prepare the Shoebox
Begin by carefully marking the locations where you will cut openings for the entrance and ventilation. Make sure that each cut is precise and appropriately sized for sparrow habitation. Utilize a ruler and pencil to draw the exact dimensions.
The entrance hole should be approximately 1.5 inches in diameter, while ventilation holes should be smaller, around 0.25 inches. Place the ventilation holes strategically on opposite sides to promote airflow.
Verify that the shoebox is structurally sound, free of damage, and preferably made of a sturdy material to provide adequate shelter. Consider reinforcing the corners with tape or glue to enhance durability.
Double-check that all measurements are accurate before proceeding to the cutting phase. Maintain precision for the best results.
Cut the Entrance Hole
With all measurements verified, proceed to carefully cut the entrance hole using a sharp cutting tool or a precise hole saw, making sure the diameter remains consistently at 1.5 inches. This specific size is crucial for sparrows, providing an ideal entry point while deterring larger predators.
Position the hole approximately 1 inch from the top edge of the shoebox front.
Tool Selection: Choose a cutting tool for control or a hole saw for precision.
Measurement Verification: Double-check the 1.5-inch diameter to maintain uniformity.
Hole Positioning: Make certain the hole is centered horizontally and 1 inch from the top.
Safety Precautions: Don protective gloves and eyewear.
Material Integrity: Prevent tearing the cardboard by applying gentle, steady pressure.
This systematic approach guarantees a proper, functional entrance for sparrows.
Add Ventilation Holes
To guarantee adequate ventilation within the sparrow house, strategically placed holes are essential. Proper hole placement should be at the top and bottom of the shoebox to facilitate efficient airflow, preventing overheating and maintaining a healthy environment.
Carefully measure and mark these locations to maintain structural integrity while optimizing air circulation.
Proper Hole Placement
Securing proper hole placement in your sparrow house is crucial, as it not only promotes adequate ventilation but also helps maintain a stable and healthy environment for the birds.
Precise placement of ventilation holes is essential for regulating internal temperature and preventing moisture buildup. Here are key considerations:
- Hole Size: Make sure ventilation holes are small enough to deter predators yet ample for airflow.
- Spacing: Distribute holes evenly around the shoebox to encourage consistent ventilation.
- Height: Position holes near the top to allow hot air to escape efficiently.
- Quantity: Use multiple holes to ensure thorough air circulation.
- Material Strength: Strengthen hole edges to sustain structural integrity and prevent wear.
These principles guarantee the sparrow house remains welcoming and secure.
Ensuring Airflow Efficiency
Effective airflow proficiency in a sparrow house can be attained by strategically adding ventilation holes, which play a crucial role in maintaining ideal internal conditions. Proper ventilation reduces heat buildup and prevents moisture accumulation, nurturing a healthier habitat for sparrows.
To achieve this, drill four to six small holes (approximately 0.5 cm in diameter) near the top edges of the shoebox. Make sure these holes are evenly spaced to promote uniform air circulation. Additionally, place a few smaller holes at the base to facilitate airflow without compromising structural integrity. This design enhances thermal regulation and reduces the risk of mold growth, ensuring a safe and comfortable environment for the birds.
Regularly inspect and clean these vents to maintain peak efficiency.
Secure the Roof
Carefully align the shoebox lid with the main structure to make sure a snug and secure fit, which is crucial for protecting the sparrows from external elements. This alignment guarantees that the roof can effectively shield the interior from rain, wind, and predators.
Utilize adhesive materials such as non-harmful glue or weather-resistant tape to firmly secure the lid. Reinforce the edges with additional support structures, like small wooden dowels, to prevent any displacement.
- Adhesive Selection: Use non-harmful glue to avoid harming the birds.
- Weatherproofing: Apply a sealant to make the roof water-resistant.
- Edge Reinforcement: Strengthen edges with dowels for added stability.
- Inspection: Regularly check for any wear and tear on the roof.
- Ventilation: Maintain small gaps for proper airflow while securing the lid.
Decorate the Sparrow House
Why not enhance the aesthetic appeal and functionality of your sparrow house with thoughtful decorations that also serve practical purposes? Consider using natural materials that blend seamlessly with the environment, ensuring the sparrows feel at home. For instance, moss, twigs, and small pebbles can be strategically placed to emulate a natural habitat. Additionally, non-toxic paint can be used to add subtle color without harming the birds.
| Decoration Material | Purpose | Method of Application |
|---|---|---|
| Moss | Camouflage/Insulation | Glue to outer surfaces |
| Twigs | Natural look/Perches | Attach using hot glue gun |
| Non-toxic Paint | Aesthetic appeal | Apply with small brushes |
These enhancements not only beautify the sparrow house but also contribute to the wellbeing of its inhabitants.
Place the Sparrow House
Once your sparrow house is thoughtfully decorated, identify a prime location that offers safety, accessibility, and a suitable environment for the birds to thrive.
Ensuring an ideal placement involves considering several critical factors to maximize the house's effectiveness.
- Elevation: Position the house at least 6-10 feet above the ground to deter predators.
- Shelter: Choose a spot with sufficient cover from the elements, such as under eaves or within tree branches.
- Orientation: Face the entrance away from prevailing winds to reduce exposure to harsh weather.
- Proximity to Food Sources: Locate near natural food supplies such as seeds, insects, and water sources.
- Human Activity: Place the house in an area with minimal human disturbance to reduce stress on the birds.
Conclusion
The creation of a sparrow house from a shoebox is not merely a simple craft project; it is a meticulous endeavor requiring precision and care.
By following each step with scientific rigor—from gathering materials to strategically placing ventilation holes and securing the roof—one guarantees an ideal habitat for sparrows.
This endeavor transcends mere hobby, embodying a profound commitment to avian conservation and ecological balance, underscoring the potential impact of even the smallest human interventions in the natural world.


